레이블이 Swift3인 게시물을 표시합니다. 모든 게시물 표시

2017년 7월 11일 화요일

CFBundleVersion Mismatch - The CFBundleVersion value '1' of extension.. 이슈

앱을 아카이브로 생성 후 업로드 시 발생 할 수 있는 오류
익스텐션을 추가하여 작업하였을 경우 앱의 번들  빌드 버젼과 익스텐션의 빌드 버젼이 다를 시
나타나는 오류로 

아카이브 생성전에
앱의 번들버전과 = 익스텐션의 번들버전
앱의 빌드버전 = 익스텐션의 빌드버전

같도록 해야하다


2017년 6월 22일 목요일

UITextView & UITextField Return button (keyboard 닫기) @@ in Swift3 - Xcode 8.2 iOS 10

UITextView & UITextField  에서 텍스트를 쓰고난 후 키보드를 사라지게 하는 방법
둘다 방법은 같다


 UITextView

1) UITextViewDelegate 추가


class DetailViewController: UIViewController, UITextViewDelegate {
               ...
}

2) UITextViewDelegate  상속 받기

@IBOutlet weak var story_textView: UITextView!

override func viewDidLoad() {
  super.viewDidLoad()

  story_textView.delegate = self
}

3) 함수 추가

func textView(_ textView: UITextView, shouldChangeTextIn range: NSRange, replacementText text: String) -> Bool {
  if (text == "\n") {
    textView.resignFirstResponder()
  } else {
  }
  return true

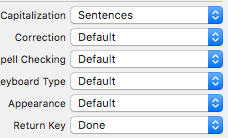
4) 스토리보드 내 TextView 의 설정 값에서 리턴키 값을  Done 로 변경


UITextField


1) UITextFieldDelegate 추가

class DetailViewController: UIViewController,  UITextFieldDelegate {
...

}

2) UITextViewDelegate  상속 받기

@IBOutlet weak var story_textfield: UITextField!

override func viewDidLoad() {
  super.viewDidLoad()

  story_textfield.delegate = self
}

3) 함수 추가

func textFieldShouldReturn(_ textField: UITextField) -> Bool {

textField.resignFirstResponder()

return true

}

4) 스토리보드 내 TextField 의 설정 값에서 리턴키 값을  Done 로 변경


2017년 6월 8일 목요일

앱 리뷰창 띄우는 SKStorereViewController 사용 @@ in Swift3 - Xcode 8.2 iOS 10.3

SKStorereViewController 는 iOS10.3 이상버전에서 작동하며 앱리뷰창을 띄워 사용자가 쉽게 앱스토어에 리뷰를 남길수 있습니다.

SKStorereViewController 사용

1.  StoreKit 추가
  import StoreKit

2. 함수 호출 
  SKStoreReviewController.requestReview()

*사용자 입력에 대한 응답으로 호출 해서는 안됩니다

사용의 예 ) 
UserDefaults.standard 를 사용하여 앱 시작시 앱 실행 횟수에 대한 숫자를 세어 5번실행했을때   SKStoreReviewController.requestReview() 를 호출하여 앱 리뷰창이 뜨도록 합니다.

if #available(iOS 10.3, *) { 
 SKStoreReviewController.requestReview()
 } else {
 // Fallback on earlier versions 
 // Try any other 3rd party or manual method here. 
 }

2017년 5월 15일 월요일

Xcode "no suitable image found" 이슈 해결

Reason: no suitable image found.  Did find:

    /Users/name/Documents/proj-name: required code signature missing for '/Users/name/Documents/proj-name/Frameworks/Project.framework/Project'

...


디버깅중에 위 같은 이유로 이슈가 발생한다면 
아래 방법으로 해결이 될 수 있다 (원인이 다를 수 있으므로)
CMD+Option+Shift+K 

2017년 4월 7일 금요일

구조체와 클래스(struct & class) @@ in Swift3.0


구조체와 클래스


1 - 1 구조체 선언

구조체 이름은 CamelCase 멤버이름은 cameBack 방식으로 지정

struct Person {

  var name : String

  var age : Int

}

1 - 2 새로운 구조체 변수 선언

새로운 구조체 변수를 선언하는 방법은 일반 변수와 동일

구조체 멤버의 값을 읽거나 할당하기 전에 반드시 유효한 값으로 초기화 해야한다.

그러므로 선언과 동시에 초기화하거나 멤버를 선언할 때 기본값을 지정

  var someone = Person(name : "mary", age: 0)

  print(someone.name)
  print(someone.age)

  someone.name = "John"
  someone.age = 3 

* 멤버 값 변경하려면 구조체를 var 로 선언 let 으로 선언 시 읽을 수 있지만 변경 시 컴파일러 오류 발생


2 - 1 클래스

클래스는 선언과 구현이 분리되어 있지 않다. Java, C# 와 동일한 방식으로 하나의 파일에서 클래스를 구현

동일한 모듈에 있는 클래스를 자동으로 인식할 수 있으므로 파일을 임포트할 필요가 없다

만일 다른 모듈에 있는 클래스를 사용하려면 해당 모듈을 임포트 하여야 한다.


2 - 2 클래스 선언

클래스는 class 키워드로 선언

class 클래스이름 : 상위 클래스 이름 {

  속성목록

  메소드 목록

}

* 상위 클래스 이름 생략 가능, 상위 클래스 가 없는 클래스는 다른 클래스의 상위 클래스 역할을 수행하는 기초 클래스가 된다.


class Person {
 
  var name = ""

  var age = 0

  func say () {

    print("Hello \(name)")

  }
}

2 - 3 클래스 초기화

클래스는 생성자를 직접 구현하지 않을 경우 파라미터가 없는 기본 생성자를 자동으로 생성한다.

앞에서 구현한 Person 클래스도 생성자를 구현하지 않았기 때문에 기본생성자가 자동으로 생성된다

새로운 Person 인스턴스는 다음과 같은 생성자 문법으로 생성할 수 있다.

let p = Person()

예)

struct Resolution{
   var width = 10
   var height = 10
}

class Person {
   // 구조체를 파라미터로 사용 가능 
  var someone =  Resolution()

  var name = ""

  var age = 0

  func say () {

    print("Hello \(name)")

  }
}

let viewMode = Person()

print (viewMode.name)
print (viewMode.age)
print (viewMode. someone.height) //  10


* 인스턴스

인스턴스 = 선언한 클래스나 구조체를 가지고 실제 값을 만드는것

설계도로 만든 건물 = 인스턴스
설계도 = 클래스, 구조체


3. 구조체와 클래스의 차이

구조체 =  복사된 종이

struct Resolution{
   var width = 10
   var height = 10
}

var someone =  Resolution()

var otherSomeonesomeone
otherSomeone.height = 20


someone.height    // 10
otherSomeone.height   //20

*  복사된 종이의 값만 바뀌기 때문에 원본은 바뀌지 않음


클래스 = 별명

별명이 수십 수백개여도 결국 이름은 하나

class Person {

  var name = "testname"

  var age = 3

}

let someone = Person()
someone.name = "mary"
someone.age = 30

let otherSomeone = someone
otherSomeone.age = 40

someone.age     // 40
otherSomeone.age   //40


2017년 3월 24일 금요일

UIButton text & textColor 변경 @@ in Swift3 - Xcode 8.2 iOS 10

UIButton 텍스트 변경 및 텍스트 컬러 변경


 -  UIButton 텍스트 변경

editButton.setTitle("test", for: .normal) 

 -  UIButton 텍스트 컬러 변경

editButton.setTitleColor(.clear, for: .normal)

 -  UIButton 백그라운드 컬러 변경

editButton.backgroundColor = UIColor.red

2017년 3월 7일 화요일

App name chage ( 앱 이름 변경) @@ in Swift3 - Xcode 8.2 iOS 10

 App 이름 변경은 간단하다.
Xcode 의 project > Info 를 열어보면 아래 이미지 처럼 "Bundle display name" 항목이 있다
거기에 변경할 앱 이름을 넣어주면 된다.


2017년 2월 20일 월요일

UIImagePickerController 를 이용한 Photo Library 사진 로드 @@ in Swift3 - Xcode 8.2 iOS 10

!!중요
info.plist 에서 Privacy - Photo Library Usage Description  키값을 추가하여 Value 값에 글을 넣어야 합니다. 이작업 없이 진행할 경우 무조건 디버깅중에 아래 글 뜨면서 오류 발생


The app's Info.plist must ... key with a string value explaining to the user how the app uses this data.

<참조>
https://swifteyes.blogspot.kr/2016/11/photolibrary-in-swift3-xcode-80-ios-10.html


1. Delegate 추가
class ViewController: UIViewController, UIImagePickerControllerDelegate, UINavigationControllerDelegate {

2. imageView, View  아울레 추가
 //불러온 사진이 들아갈 뷰
@IBOutlet weak var profileImage: UIImageView!
// 터치하여 Photo Library 를 호출
@IBOutlet weak var profileView: UIView
// UIImagePickerController
let ProfileimagePicker = UIImagePickerController()


3. viewDidLoad() 에 Photo Library 를 호출할 뷰에 터치 액션 넣기
override func viewDidLoad() {
  super.viewDidLoad()

// profileView 를 터치하면  photoAddAction() 가 호출된다
let photoAddAction = UITapGestureRecognizer(target: self, action: #selector(self.photoAddAction(_:)))
self.profileView.addGestureRecognizer(photoAddAction)


4. photoAddAction(_ sender: AnyObject) 에 코드 넣기
func photoAddAction(_ sender: AnyObject){
//포토라이브러리 지원여부
  if UIImagePickerController.isSourceTypeAvailable(UIImagePickerControllerSourceType.savedPhotosAlbum){

    //에디팅 여부 true 경우 사진을 에디팅 할 수 있는 뷰 나타남, 에디팅 없이 사진 불러오거나  자신이 만든 에디팅뷰 사용할 경우 false로 설정
    ProfileimagePicker.allowsEditing = true
    // camera, Save photoalbum, PhotoLibrary 중 타입 선택

    ProfileimagePicker.sourceType = .photoLibrary
  self.present(ProfileimagePicker, animated: true, completion: nil)
  }else{
    //"사진라이브러리 접근 할 수 없음" 알럿 뷰
    let alertController = UIAlertController(title: "test", message:
    "Can not access the photo library", preferredStyle: UIAlertControllerStyle.alert)
    alertController.addAction(UIAlertAction(title: "Check", style: UIAlertActionStyle.default,handler: nil))
    self.present(alertController, animated: true, completion: nil)
  }
}


4. 에디팅 된 사진 가져오기
func imagePickerController(_ picker: UIImagePickerController, didFinishPickingMediaWithInfo info: [String : Any]) {
  var newImage: UIImage
  if let possibleImage = info["UIImagePickerControllerEditedImage"] as? UIImage {
    newImage = possibleImage
  } else if let possibleImage = info["UIImagePickerControllerOriginalImage"] as? UIImage {
    newImage = possibleImage
  } else {
    return
  }
//에디팅 후 가져온 사진 이미지뷰에 넣기
  profileImage.image = newImage
  self.dismiss(animated: true, completion: nil)
/*
자신이 만든 에디팅 뷰로 사진을 가져가고 싶다면 아래코드 참조
// 자신이 만든 에디팅 뷰컨트롤러 로드
let uvc = self.storyboard!.instantiateViewController(withIdentifier: "CustomimageView") as! CustomPhotoViewController 
// 뷰넘어가는 퍼포먼스 (없어도됨)
uvc.modalTransitionStyle = UIModalTransitionStyle.coverVertical 
// 커스텀 뷰 컨트롤러의 이미지 뷰에 사진 넣기
uvc.Cropimage = newImage 
self.present(uvc, animated: true, completion: nil)
*/
}

// 포토라이브러리 Cancel 버튼 클릭 시
func imagePickerControllerDidCancel(_ picker: UIImagePickerController) {
  self.dismiss(animated: true, completion: nil)
}

2017년 2월 15일 수요일

CGRectMake, CGPointMake, CGSizeMake, CGRectZero, CGPointZero Swift3문법으로 사용 @@ in Swift3 - Xcode 8.2 iOS 10

Swift2 에서 사용되던 CGRectMake, CGPointMake, CGSizeMake, CGRectZero, CGPointZero가 Swift3에선 바뀌었다.


CGRect(x: Int, y: Int, width: Int, height: Int
CGVector(dx: Int, dy: Int
CGPoint(x: Double, y: Double
CGSize(width: Int, height: Int)


Example:

let newPoint = stackMid.convert(CGPoint(x: -10, y: 10), to: self)
self.physicsWorld.gravity = CGVector(dx: 0, dy: gravity)
hero.physicsBody = SKPhysicsBody(rectangleOf: CGSize(width: 16, height: 18))
let back = SKShapeNode(rect: CGRect(x: 0-120, y: 1024-200-30, width: 240, height: 140), cornerRadius: 20)


더 자세한 내용은 아래 참조

2017년 2월 7일 화요일

UIButton.addTarget 사용 @@ in Swift3 - Xcode 8.2 iOS 10

UIButton.addTarget 사용하기

button.addTarget(self, action:#selector(handle(sender:)), for: .touchUpInside)


func handle(sender: UIButton){ 

  //... 
}

2017년 1월 27일 금요일

Number Pad 에 Done 버튼 추가하기 @@ in Swift3 - Xcode 8.2 iOS 10


TextField 타입중에 Number Pad 타입을 선택할 경우 Done 버튼이 없다
Done 버튼을 추가하고 터치 시 키보드가 사라지는 액션을 추가해보자

스토리보드에 UITextField 를 추가 하고 타입을 Number Pad 로 바꾼다음 아울렛을 추가한다

@IBOutlet weak var numberPad: UITextField!


그리고 UITextField의 아래 이미지처럼 액션을 추가한다 

Event 가 Editing Did Begin 이다 다시 확인 하자

이제 액션함수에  TextField 가 나타나면 위에 Done 버튼을 넣는 코드를 넣는다.

@IBAction func TextFieldAction(_ sender: UITextField) {
  let doneToolbar: UIToolbar = UIToolbar(frame: CGRect(x: 0, y: 0, width:   UIScreen.main.bounds.width, height: 50))
  doneToolbar.barStyle = UIBarStyle.blackTranslucent
  let flexSpace = UIBarButtonItem(barButtonSystemItem: UIBarButtonSystemItem.flexibleSpace, target: nil, action: nil)
  let done: UIBarButtonItem = UIBarButtonItem(title: "Done", style: UIBarButtonItemStyle.done, target: self, action: #selector(doneButtonAction))
  let items = NSMutableArray()
  items.add(flexSpace)
  items.add(done)
  doneToolbar.items = items as? [UIBarButtonItem]
  doneToolbar.sizeToFit()
  self. numberPad.inputAccessoryView = doneToolbar
}


Done 버튼을 눌렀을때 키보드창이 사라지는 함수

func doneButtonAction(){
self. numberPad.resignFirstResponder()
}


2017년 1월 26일 목요일

버튼 (UIButton) 의 @IBAction 을 함수로 호출하기 @@ in Swift3 - Xcode 8.2 iOS 10

스토리보드에서 UIButton을 추가 후 Action과 아울렛, 터치 이벤트를 설정하고 추가하게 되면
아래처럼 추가된다.

@IBOutlet weak var testButton : UIButton! 


@IBAction func ButtonAction(_ sender: Any){
   print("Action Start")
}

스토리보드 상에서 UIButton 을 직접 터치 하지 않고 "Action Start"를  호출하기 위해선
아래처럼 쓰면 된다.

testButton.sendActions(for: .touchUpInside)

위 함수를 호출 시 "Action Start" 가 호출 되는것을 확인 할 수 있다.

2017년 1월 11일 수요일

UICollectionView cell size 변경 @@ in Swift3 - Xcode 8.2 iOS 10

컬렉션 뷰의 셀 사이즈를 변경 하는데 Swift3.0에선 기존 코드가 적용되지 않습니다.
Swift3.0 에서 셀 사이즈를 변경하는 방법을 알아보았습니다.

- 기존 코드 -

func collectionView(_ collectionView: UICollectionView, layout collectionViewLayout: UICollectionViewLayout, sizeForItemAt indexPath: IndexPath) -> CGSize {
  return CGSize(width: 150, height: 150) 
}


- Swift3 - 
class ViewController: UICollectionViewDelegateFlowLayout, UICollectionViewDelegate { 
}

* UICollectionViewDelegateFlowLayout을 추가해주는 부분이 변경되었습니다.


 func collectionView(_ collectionView: UICollectionView, layout collectionViewLayout: UICollectionViewLayout, sizeForItemAt indexPath: IndexPath) -> CGSize { 

  return CGSize(width: 150, height: 150)

} }


2017년 1월 6일 금요일

Read - Eval - Print - Loop (REPL) 터미널에서 Swift 코딩하기 @@ Swift3.0

Read - Eval - Print - Loop

명령을 읽고 평가하고 결과를 출력하고 처음으로 돌아가 같은 작업을 반복

* REPL은 명령행 툴이며 간단한 코드를 신속하게 테스트 하는데 환경과 편의를 제공해줍니다. 


REPL 장점

C, C++, Objective - C 언어에서 해야하는 테스트 작업을 하지 않아도 된다는 점

* Command line tools for Xcode 가 설치되어 있어야 합니다. ( Xcode 설치 하면 자동 설치됨)


1. 터미널 실행 > 아래명령어 입력 (한번만 실행, 버전이 바뀔 시 실행)

<sudo xcode-select -switch /Applications/Xcode.app/Contents/Developer>


2. 관리자 비밀번호 입력 후 명령어 입력

<xcrun swift>

잠시후 "Welcome to Apple Swift version 3.1 (swiftlang-802.0.53 clang-802.0.42). Type :help for assistance." 이란 메세지가 뜹니다

"hello" 를 출력해 보겠습니다.


이제 직접 코드를 넣어 테스트 하시기 바랍니다.


2016년 12월 20일 화요일

Swift3 에서 CocoaPods 설치 및 사용하기 (CocoaPods install & library add) @@ in Swift3 - Xcode 8.2 iOS 10

SWIFT3 프로젝트에 CocoaPods 연동하기


- 순서 -

1. 프로젝트 생성

2. CocoaPods 다운로드 및 설치 (처음 설치 시)

3. CocoaPods Podfile 생성 및 설정

4. 라이브러리 설치 및 사용


Step 1 프로젝트 생성

Xcode 를 실행하여 CocoaPods를 연동할 프로젝트를 만든다.
프로젝트 이름은 "cocoapods_test" 로 하였다.


Step 2 CocoaPods 다운로드 및 설치

한번도 CocoaPods 를 설치하지 않았다면 아래와 같이 터미널을 실행하여 CocoaPods 을 설치한다
이미 설치를 했다면 건너뛰도록한다.

1) 터미널 실행하여 설치 명령어 입력 ->  “sudo gem install cocoapods”
(참고로 제거는 sudo gem uninstall cocoapods)

<설치명령어 입력>


<설치 완료>


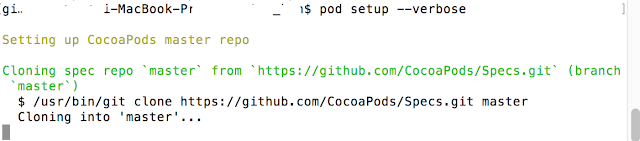
설치가 완료 되었다면 필요한 라이브러리들을 정리하기 위해 “pod setup --verbose” 명령어 실행
*설치 안해도 됩니다 필요하다면 설치하세요 참고로 오래 걸립니다. (5시간걸림)
 너무 오래걸려 해결책을 찾아 시도 하였으나 저한테는 변화가 없었음.. 참고하세요
http://stackoverflow.com/questions/21022638/pod-install-is-staying-on-setting-up-cocoapods-master-repo


<“pod setup --verbose” 입력>

Step 3 CocoaPods Podfile 생성 및 설정

설치를 완료했다면 Step1에서 생성한 프로젝트 폴더 내 경로로 이동하여 “pod init” 명령어를 실행한다. 실행후 자동으로 PodFile이 생성된다.

<"pod init"명령어 실행 후 Podfile 이 생성 됨을 확인할 수 있다.>


<프로젝트 폴더>


Podfile 을 여는 명령어는 두가지가 있다
"open -e podfile"
"open -a Xcode Podfile"


하나는 일반 메모장을 여는 것이고 하나는 Xcode 에서 파일을 여는 것이다.
둘중 아무거나 해도 상관없으니 일단 파일을 열어보자


Step 4  라이브러리 설치 및 사용

위에서 열었던 podfile 에 라이브러리를 추가한다. 
일단 필요없는부분을 지우고 라이브러리 "SCLAlertView"를 추가하여보자

이제 저장을 하고  터미널로 돌아와 프로젝트 폴더 경로에서 "pod install" 입력하여 라이브러리를 설치
하도록 한다


설치가 다 되었다면 프로젝트 폴더내에 프로젝트명.xcworkspace 파일을 열어본다


실행된 Xcode를 보면 라이브러리가  아래와 같이 xcode내에서 Pods 프로젝트가 import되어 있는 것을 확인할수 있다.


방금전 설치한 라이브러리가 정상적으로 설치되어 있는지 아래 ViewController 클래스내 함수에서
직접 코딩을 통해 확인가능하다.

2016년 12월 6일 화요일

UIViewController, Dismiss and Present @@ in Swift3 - Xcode 8.0 iOS 10

기존에 열려있는 firstViewController 를 Dismiss 하고 secondViewController를 Present 하기 위해
---------------------------------------------------------------------------------------
self.dismiss(animated: true, completion: {
  let vc = self.storyboard?.instantiateViewController(withIdentifier: "secondViewController")
  self.present(vc!, animated: true, completion: nil)
})
=========================================================================
아래 오류가 뜬다.
whose view is not in the window hierarchy!


이때는 뷰계층구조상 rootViewController를 사용해야한다.
---------------------------------------------------------------------------------------
self.dismiss(animated: true, completion: {
   let vc = self.storyboard?.instantiateViewController(withIdentifier: "secondViewController")
   let appDelegate = UIApplication.shared.delegate as! AppDelegate
   appDelegate.window?.rootViewController!.present(vc, animated: true, completion: nil) 
})
=========================================================================

이렇게 하면 기존의 firstViewController는 닫히고 secondViewController 가 열린다

2016년 12월 5일 월요일

coreData Entites 이슈 @@ in Swift3 - Xcode 8.0 iOS 10


코어데이터의 Entites 생성하고 Attributes 값을 추가한 다음
xcode - > Editor -> createNSManagedObject SubClass.. 를 클릭하여
파일이 생성된 후 빌드 시 아래 이슈가 발생한다면

Command /Applications/Xcode.app/Contents/Developer/Toolchains/XcodeDefault.xctoolchain/usr/bin/swiftc failed with exit code 1


코어데이터의 Entites를 선택하여 우측 inspector 탭을 눌러
Class 항목의 Codegen을 Manual/None 로 선택하여 빌드하면 이슈가 사라진다

2016년 12월 4일 일요일

Archive 가 비활성화 되는 경우 해결법! @@ in Swift3 - Xcode 8.0 iOS 10

xcode  ->  product -> Archive 가 비활성화 되는 경우 해결법!

시뮬레이터로만 빌드하였을 경우 Archive 항목이 비활성화 되는 경우가 발생한다

그땐 디바이스를 연결하여 빌드하면 활성화 된다.

2016년 11월 25일 금요일

MFMailComposeViewController 로 이메일 보내기 (Send Email) @@ in Swift3 - Xcode 8.0 iOS 10

MFMailComposeViewController 를 이용해 이메일 보내기 !

//import MessageUI 하기
  import UIKit
  import MessageUI

// MFMailComposeViewControllerDelegate 추가 
class OptionpageViewController: UIViewController, MFMailComposeViewControllerDelegate {

    override func viewDidLoad() {
         super.viewDidLoad()

    }
     ...
}


//Email Send 함수 설정
func EmailSend(_ sender: AnyObject){
     let mailVC = MFMailComposeViewController()
     mailVC.mailComposeDelegate = self
     mailVC.setToRecipients(["yourEmail@xxx.xx"])
     mailVC.setSubject("")
     mailVC.setMessageBody("Your messagge", isHTML: false)
     present(mailVC, animated: true, completion: nil)
// 2016.12.2 수정  앱 심사중에  네트워크 충돌로 거부사유 됨 아래코드 활용
    if MFMailComposeViewController.canSendMail(){
       self.present(mailVC, animated: true, completion: nil)
    }
        }

       
}


// mailComposeController 델리게이트 메소드 활용하여 창 닫기 함수 설정

func mailComposeController(_ controller: MFMailComposeViewController,
didFinishWith result: MFMailComposeResult, error: Error?) {
     controller.dismiss(animated: true, completion: nil)
}


추천 게시물

애플 개발자 등록방법 2016년 5월 8일 기준!!

애플 개발자 등록 절차 1. 개발자 등록 페이지 이동    애플 개발자 로그인 > Account 페이지 이동 > 하단 영역 클릭 (이미지 참조)   >> Enroll 클릭 >> 무조건 승인!! ...